
Figure out how to flush the DNS store on your Mac to fix a scope of web related issues.
Are you having trouble loading websites in your browsers? A possible culprit is your DNS cache. You can clear this cache without harming anything on your Mac, and this can potentially fix your website-loading issues.
Depending on the macOS version you use, you need to execute a particular command in Terminal to get rid of all your DNS cache content. We’ll show you how to do just that on your Mac.
Why Should You Flush the DNS Cache on a Mac?
Generally, you should clear the DNS cache when you experience DNS-related errors on your Mac. This includes any DNS error messages you see in your browsers as well as any apps you use on your Mac.
Clearing the DNS cache helps fix some browsing-related issues. This is because of how the DNS works on your computer. As you might already know, DNS translates your domain names to IP addresses. If the DNS cache gets corrupted, or there are other issues with it, that translation fails which results in interrupted browsing sessions.
Flushing the DNS cache helps fix these issues on your Mac.
How to Clear the DNS Cache on a Mac
In macOS, you can flush the DNS cache by running a command with Terminal. There are variations of this command and you need to use the one that’s appropriate for your macOS version.
Step 1. Find Your macOS Version
The first thing you need to do is to find your macOS version. This will help you decide which command to use to clear the DNS cache.
To check your macOS version, click the Apple logo in the top-left corner of your screen and select About This Mac.
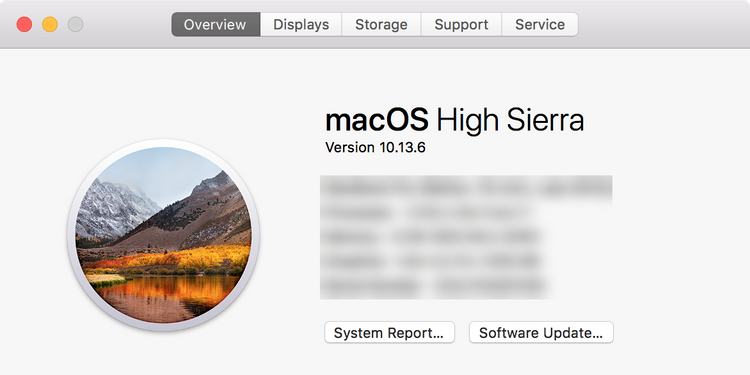
You’ll see your macOS name just as its adaptation. Observe this adaptation as you’ll utilize it in the accompanying area when you really erase the DNS reserve.
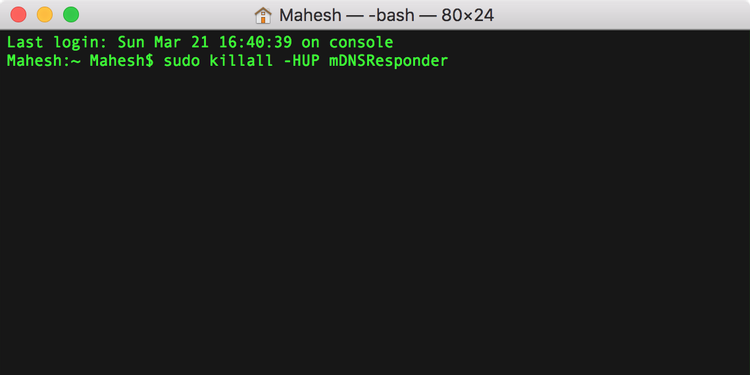
Stage 2. Run a Command to Flush the DNS Cache
You’ll utilize a Terminal window to execute an order and flush the DNS store on your Mac. Here’s the way you do that:
Open Terminal by discovering it with Spotlight, Launchpad, or Finder.
On the off chance that your macOS form is 10.11 or later, type the accompanying order into the Terminal and hit Enter:
sudo killall – HUP mDNSResponder
On the off chance that you use macOS form 10.10, utilize this order to flush the DNS store:
sudo discoveryutil udnsflushcaches
macOS 10.7, 10.8, and 10.9 clients should utilize this order:
sudo killall – HUP mDNSResponder
macOS 10.6 proprietors need to run the accompanying order:
sudo dscacheutil – flushcache
On the off chance that you run macOS 10.5 or before, here’s the order to allow you to flush the DNS reserve:
sudo lookupd – flushcache
On the off chance that you notice, each order has sudo toward the start; this implies you’ll be approached to enter your administrator secret phrase before you can run an order. Ensure you have your secret key helpful before you attempt to execute any of these orders on your Mac.
Does Flushing the DNS Cache Cause Any Issues?
At the point when you flush the DNS reserve, you’re just erasing the stored passages of the DNS. You will not experience any issues because of eliminating these DNS reserve records.
The following time you attempt to interface with a site from your program, your program will bring new sections from the DNS worker. These sections will be saved in the DNS store and the cycle will proceed.
Clear the DNS Cache to Fix DNS-Related Issues on a Mac
Flushing the DNS store doesn’t hurt your Mac in any capacity, thus you ought to do this without a second thought each opportunity you go over a DNS issue. This can really fix numerous worker related area name issues on your PC.
Other than DNS, you can clear numerous other reserve types on your Mac too. Clearing the reserve is a speedy and simple investigating strategy for an entire scope of issues.