
USB Recovery Drive Recuperation drives are a basic apparatus when you keep running into issues with Windows 10 since they can enable you to repair your failing PC or gadget. Be that as it may,
you should initially know how to make one for yourself.
The application that can enable you to settle a harmed Windows 10 framework is called Recovery Media Creator.
In this instructional exercise,
we demonstrate to you generally accepted methods to utilize the Recovery Media Creator to make a recuperation drive for Windows 10,
on a USB memory stick or an outside hard drive
USB Recovery Drive Begin the Recovery Media Creator in Windows 10
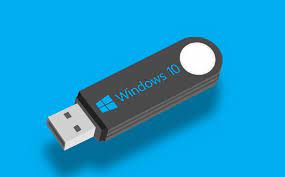
USB Recovery Drive The principal thing you have to do is connect to the USB memory stick or outside hard drive which you need to move toward a recuperation drive.
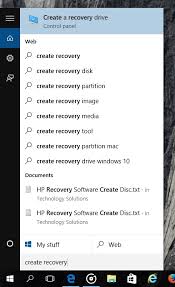
When Windows 10 has distinguished it effectively, go to the hunt box close to the Start catch,
and sort “recuperation.” In the rundown of results, snap or tap “Make a recovery drive.”
Another approach to begin the Recovery Media Creator is from the Settings application.
The quickest method to open Settings is to press the WIN + I keys on your console,
yet there are additionally different approaches to open Settings. In the Settings window,
type recuperation in the inquiry box on the best and snap or tap “Make a recuperation drive.”
You can likewise begin the Recovery Media Creator from the Control Panel. Open Control Panel in symbols view and snap or tap Recovery.
You should see three recuperation instruments, from which you should pick “Make a recuperation drive.”
A UAC (User Account Control) provoke shows up,
inquiring as to whether you permit Recovery Media Creator to roll out improvements to your PC.
Snap or tap Yes to begin Recovery Media Creator.
USB Recovery Drive Make a Windows 10 Recovery Drive
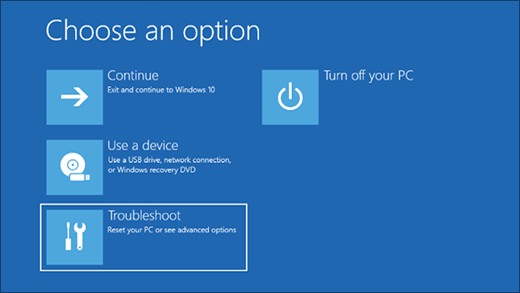
The Recovery Media Creator reveals to you that “Regardless of whether your PC can’t begin,
you can utilize a recuperation drive to reset it or investigate issues.
On the off chance that you back up framework documents to this drive, you’ll likewise have the capacity to utilize it to reinstall Windows.”
You see a checkbox that says “Reinforcement framework records to the recuperation drive.” If you empower the checkbox,
the recuperation drive gives you the choice later,
amid recuperation, to introduce Windows 10 if the framework documents are harmed.
In the event that you deselect the framework documents check box, the recuperation framework needs less space,
and you can utilize littler glimmer drives.
For Windows 10 32-bit you need a recuperation drive with somewhere around 4GB of space and, for 64-bit,
you require at least 8GB. Pick the alternative you need and snap or tap Next.
You are requested to choose a USB streak drive (or outer hard circle) that has a base storage room that shifts relying upon what you picked before.
For our situation, it requested least 8 GB of room.
Ensure that you don’t have any information left on the drive since it will be deleted all the while.
Select the drive on which you need the recuperation instruments to be spared, and snap or tap Next.

You get a notice message that everything on the drive will be eradicated. This is your last opportunity to spare the information on it.
When you are prepared to begin the procedure, snap or tap Create.

Presently the drive is arranged, and the framework recuperation instruments are duplicated on it.
This procedure could take up to 10-15 minutes on the off chance that you are likewise duplicating Windows 10 framework records.
This additionally relies upon the speed of your recuperation drive. We prescribe that you utilize a quick USB 3 streak drive or outside hard plate.
It makes the procedure quicker.
At the point when the recuperation drive is made, you are educated about it. Snap or tap Finish, and that is it.
You presently have a recovery drive which can get you out of inconvenience if Windows 10 chooses not to hear you out any longer.