

How to make a GIF
- Upload your photos to Photoshop.
- Open up the Timeline window.
- In the Timeline window, click “Create Frame Animation.”
- Create a brand new layer for each new body.
- Open the identical menu icon at the right, and choose “Make Frames From Layers.”
- Under each frame, pick out how lengthy it need to seem for before switching to the next frame.
- At the lowest of the toolbar, pick how usually you would find it irresistible to loop.
- Preview your GIF through pressing the play icon.
- Save and Export Your GIF.
Make an Animated, If you have spent any time on the net in any respect, you’ve got likely come in touch with an lively GIF. It’s an photograph record that permits you to function animated photographs, which makes it seem like the picture is moving. Think of them as a hybrid among a nonetheless picture and a video.
Why are GIFs exceptional additions in your advertising and marketing? They’re clean to consume, offer a brand new way to seize your visitors’ attention, and might have a serious emotional effect. And when you consider that content material that makes us sense something encourages us to share, those tiny animations are really worth experimenting with.
Explore Adobe Photoshop CC basics through quick tips, video explainers, and custom photo filters here.
The excellent component about GIFs is they are not too tough to make. If you have get admission to to Photoshop and a couple of minutes to spare, you could create an lively GIF right away.
In the following academic on making lively GIFs, I’m the use of the Creative Cloud 2015 model of Photoshop, however the steps need to be comparable in different variations.
How to Create an Animated GIF in Photoshop
Here’s an example of an lively GIF you might make the usage of this academic:
Alright, let’s get started.
Step 1: Upload your images to Photoshop.
If you already have images created …
Gather the photos you want in a separate folder. To add them into Photoshop, click File > Scripts > Load Files Into Stack.
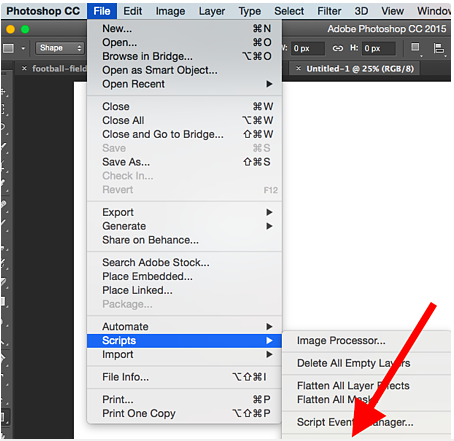
Then, pick Browse, and pick out which files you would like to apply on your GIF. Then, click on OK.
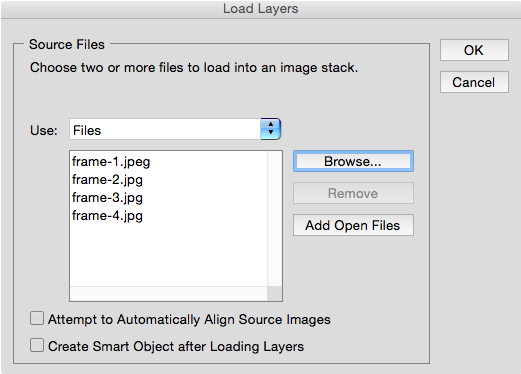
Photoshop will then create a separate layer for every photograph you’ve got decided on. Once you’ve completed that, skip to step two.
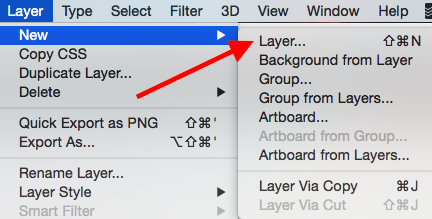
If you don’t already have the series of images created …
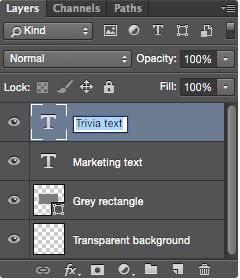
Create each body of the lively GIF as a one-of-a-kind Photoshop layer. To upload a brand new layer, chose Layer > New > Layer.
Be sure to call your layers so you can maintain song of them effortlessly while you make your GIF. To call a layer, visit the Layer panel on the lowest right of your screen, double-click at the default layer name, and sort inside the call you need to trade it to. Press Enter while you’re finished.
Once you’ve got your layers in there and you’ve got named all of them, you’re ready for step two.
Pro Tip: If you want to mix layers so they appear in a single frame for your GIF, flip visibility on for the layers you need to merge (via clicking on the “eye” to the left of every layer name so handiest the eyes for the layers you want to merge are open). Next, press Shift + Command + Option + E (Mac) or Shift + Ctrl + Alt + E (Windows). Photoshop will create a brand new layer containing the merged content material, which you ought to additionally rename.
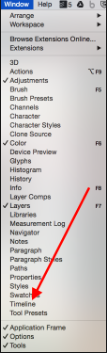
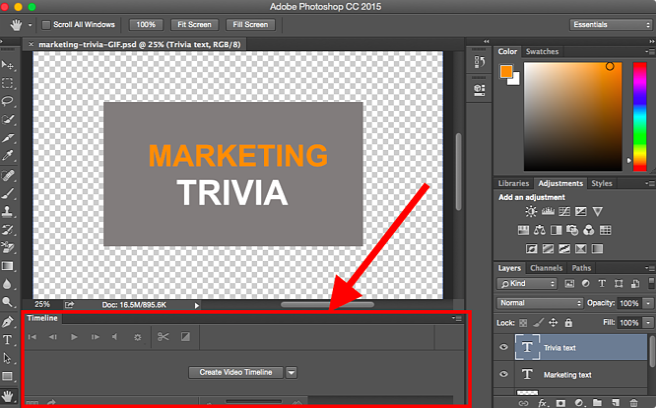
Step 2: Open up the Timeline window.
To open Timeline, visit the pinnacle navigation, choose Window > Timeline. The Timeline will allow you switch unique layers on and rancid for exclusive intervals of time, thereby turning your static image right into a GIF.
The Timeline window will seem at the bottom of your display. Here’s what it looks as if:
Step 3: Make an Animated, In the Timeline window, click “Create Frame Animation.”
If it’s not automatically selected, pick it from the dropdown menu — but then be sure to genuinely click on it, otherwise the frame animation alternatives may not show up.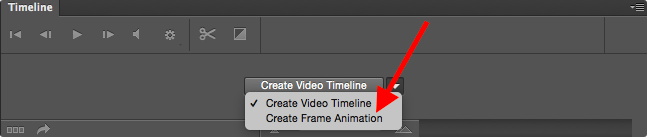
Now, your Timeline should look something like this:

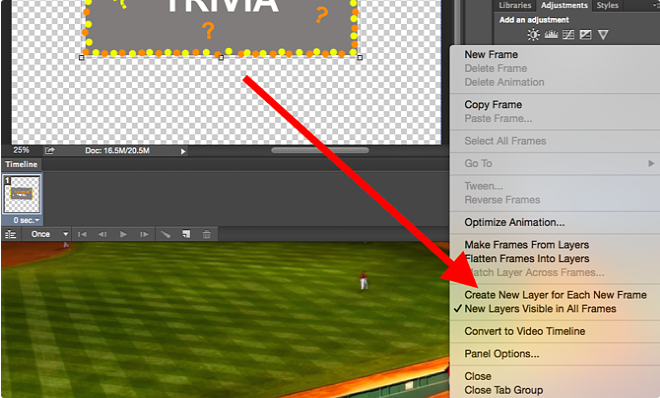
Step 4: Make an Animated, Create a new layer for each new frame.
To do that, first choose all your layers via going to the top navigation menu and deciding on Select > All Layers.
Then, click on the menu icon at the right of the Timeline display.
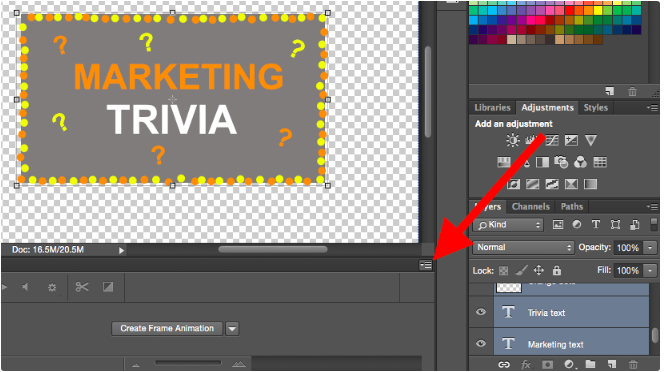
From the dropdown menu that appears, pick out Create new layer for every new frame.
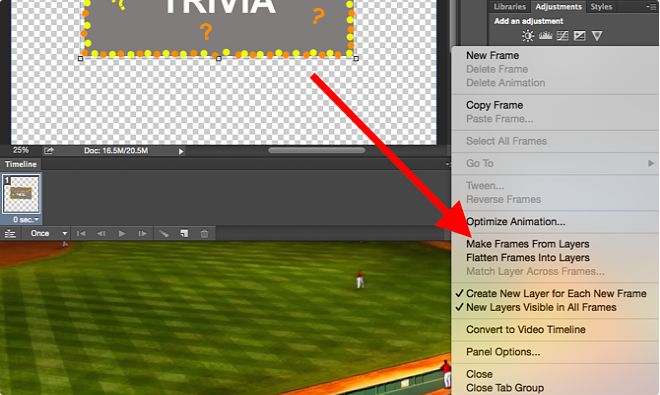
Step 5: Open the same menu icon on the right, and choose “Make Frames From Layers.”
This will make each layer a frame of your GIF.
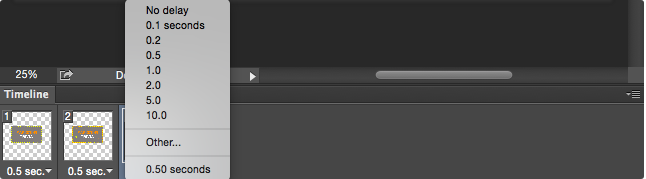
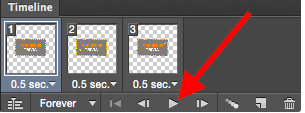
Step 6: Under each frame, select how long it should appear for before switching to the next frame.
To do this, click on the time underneath every body and choose how lengthy you’ll like it to appear. In our case, we chose 0.5 seconds per frame.
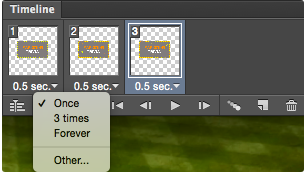
Step 7: At the bottom of the toolbar, select how many times you’d like it to loop.
The default will say Once, however you may loop it as many times as you need, including Forever. Click Other in case you’d like to specify a custom number of repetitions.
Step 8: Preview your GIF by pressing the play icon.
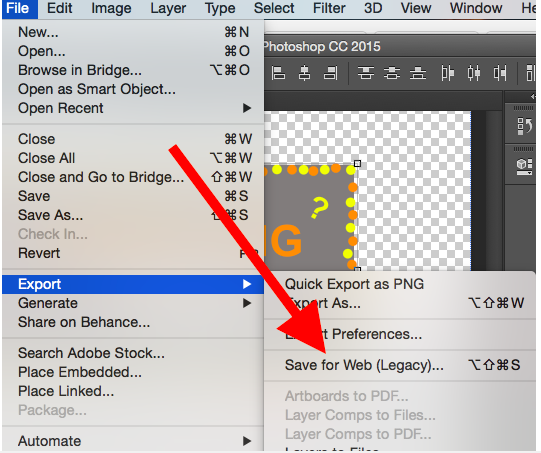
Step 9: Make an Animated, Save and Export Your GIF
Satisfied together with your GIF? Save it to apply online with the aid of going to the top navigation bar and clicking File > Export > Save for Web (Legacy)…
Next, pick out the type of GIF file you’d like to store it as under the Preset dropdown. If you’ve got a GIF with gradients, pick out Dithered GIFs to save you shade banding. If your photograph employs a whole lot of stable hues, you could opt for no dither.
The variety subsequent to the GIF document determines how massive (and the way unique) the GIF colorings might be as compared to the authentic JPEGs or PNGs. According to Adobe, a better dithering percent translates to the advent of extra colours and element — but it increases the report size.

Click Save at the bottom to store the report for your computer. Now you’re prepared to upload this GIF to use to your advertising!
Upload the GIF document into any area on-line which you’d put an picture, and it should play seamlessly. Here’s what the very last product may look like:

How to Use GIFs in Your Marketing
01. Make an Animated, On social media.
Pinterest become the primary to enable animated GIFs, observed with the aid of Twitter. And by means of the summer of 2015, Facebook had additionally jumped on the GIF bandwagon. Then, Instagram modified the sport with Boomerang, which we could customers film and proportion their own GIFs. On any of these social feeds, animated GIFs may be a wonderful way to stand out in a crowded feed.
For example, test out how Product Hunt used a GIF to promote a discussion board on its website:
02. Make an Animated, In your emails.
Animated GIFs display in e mail the equal manner a ordinary image does. So why not spruce up your emails through replacing still pics with animated ones?
Not most effective ought to this assist seize recipients’ attention with novelty by myself, however it could also have a direct impact to your bottom line. For a few brands, which includes an lively GIF in emails correlated with as plenty as a 109% increase in sales.
Make use of GIFs by using showcasing merchandise, making occasion announcements, or otherwise attractive readers. Check out the GIF under from girls’s garb keep Ann Taylor LOFT: They made a gift appear like it is shaking to create intrigue and get recipients to click through to “unwrap” their present.

03. Make an Animated, In blog posts.
Your weblog submit would not need to be about lively GIFs or established like a BuzzFeed-style listicle to include GIFs — despite the fact that, we do love an excellent dose of silly listicle GIFs each once in a while.
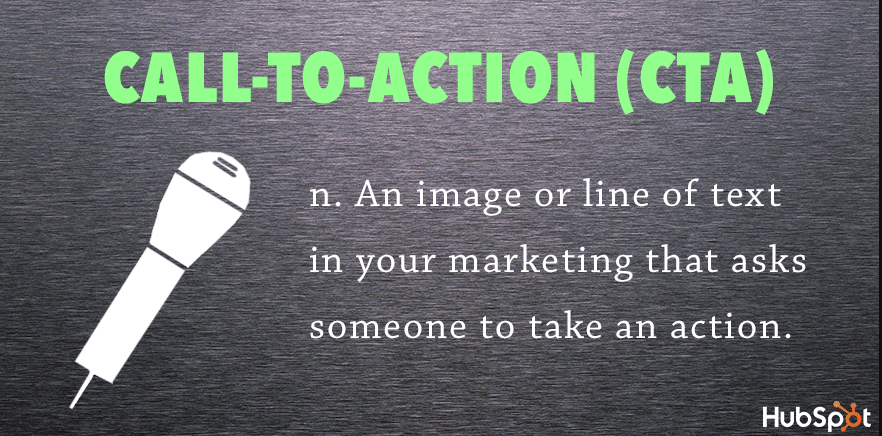
For instance, here’s a easy, animated GIF created by means of fellow marketer Ginny Mineo to provide an explanation for the definition of a name-to-movement for a blog put up:
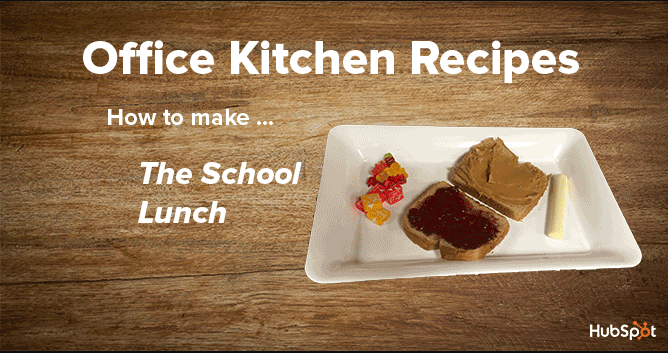
And in the end, one in all our oldie-however-goodie favorites: an animated GIF from a publish on office kitchen recipes.
How will you use GIFs for your advertising and marketing? Share with us inside the remarks.
Editor’s Note: This put up became at the beginning posted in September 2013 and has been up to date for freshness, accuracy, and comprehensiveness.Make an AnimatedEditor’s Note: This put up became at the beginning posted in September 2013 and has been up to date for freshness, accuracy, and comprehensiveness.